BIOSMETICS
BIOSMETICS eyebrow and eyelash lamination kit
BIOSMETICS eyebrow and eyelash lamination kit
Couldn't load pickup availability
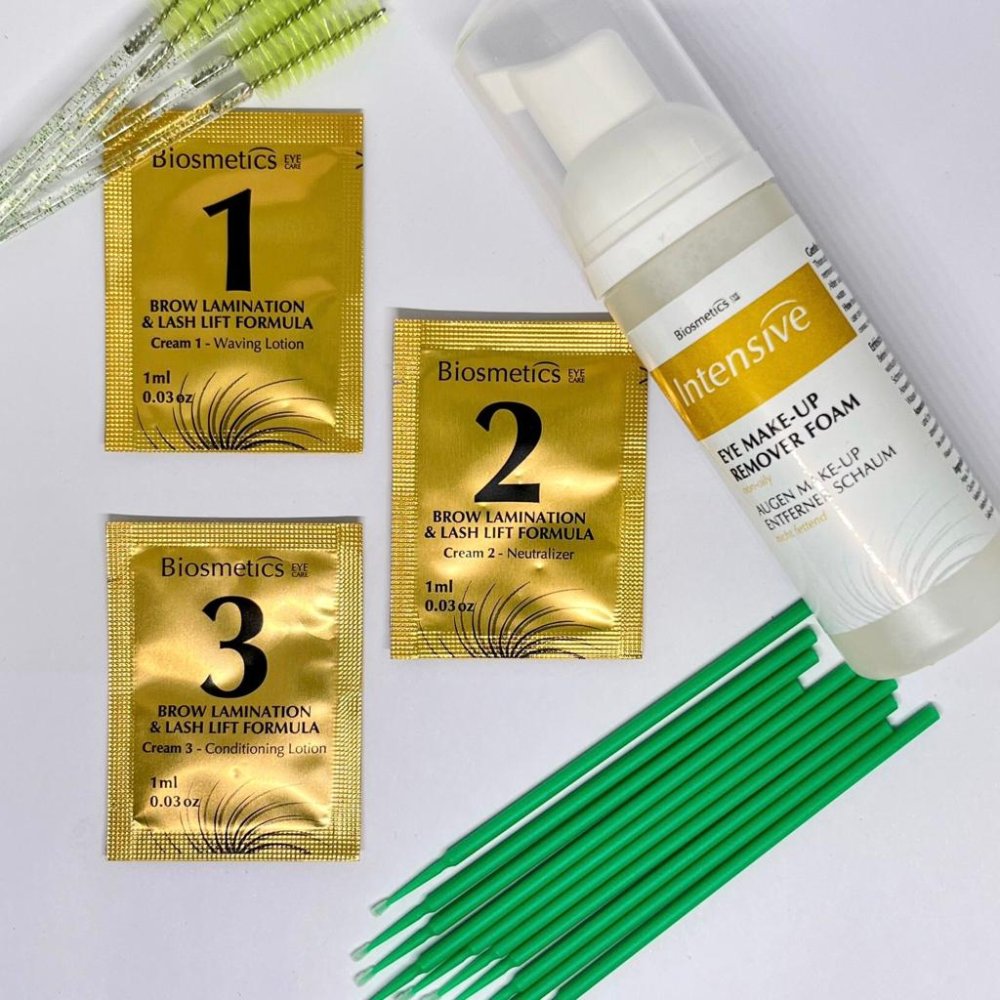
Biosmetics eyebrow and eyelash lamination set
Set contents:
BIOSMETICS - permanent №1 for eyelash and eyebrow lamination Lifting cream, 1 ml
BIOSMETICS - permanent №2 for eyelash and eyebrow lamination Neutralizing cream, 1 ml
BIOSMETICS - permanent №3 for eyelash and eyebrow lamination Conditioner, 1 ml
BIOSMETICS - cleansing foam for eyelashes and eyebrows, 50 ml
Micro brushes, 10 pcs
Eyelash brushes, 5 pcs
Eyebrow lamination:
- Remove makeup and cleanse your eyebrows and the area around them with an oil-free cleanser.
- Treat the skin with saline solution or a special shampoo. The use of peeling is unacceptable!
- Comb your eyebrows with a brush and apply a thin layer of LASH & BROW BOND. Slowly and carefully comb through the hairs, adding the desired shape.
- Apply protective zonal gel around the eyebrows, avoiding the hairs.
- Apply a thin layer of PERM & LIFT Cream No 1 – Waving Lotion to the hair (mix thoroughly before use), cover with osmotic foil and leave for 4-10 minutes. Then remove the gel with dry cotton swabs.
- Apply a thin layer of PERM & LIFT Cream No 2 – Neutralizer to the hair (mix thoroughly before use) and leave on for 5-6 minutes. Then remove the gel with dry cotton swabs.
- Remove any remaining LASH & BROW BOND adhesive with saline solution.
- After eyebrow lamination treatment, it is recommended to apply a special Biosmetics eyebrow color.
- Apply a thin layer of PERM & LIFT Cream No 3 – Conditioning Lash Food Lotion to the hairs with a micro-brush. This composition is not rinsed off or removed.
Eyelash lamination:
- Clean the eye area and eyelashes – we recommend using a cleansing foam or oil-free micellar water. They will ensure perfect treatment results. Rinse the foam off with water.
- Then use a salt degreaser (pre-treatment).
- Seal the lower lashes with a collagen or hydrogel pad.
- Apply a few drops of lamination glue to the bottom of the silicone roller and place it on the top lid very close to the roots.
- Glue the eyelashes to the roller.
-
Apply PERM & LIFT Cream No 1 – Waving Lotion (mix thoroughly before use). Approximate exposure time (varies depending on lash porosity, curl test, room temperature):
- Very thin lashes: 4-5 minutes
- Thin or colored lashes: 5-6 minutes
- Normal healthy eyelashes: 6-8 minutes
- Firm, thick lashes: 9-10 minutes
The first step is applied 2 mm from the roots to 50% to 70% of the length of the eyelashes. Do not wrap the product with foil. Never apply to the tips of the eyelashes.
- Wipe off the product with a brush or paintbrush, do not use water. If the eyelashes come off the curler, stick them back with a small amount of glue.
-
Apply PERM & LIFT Cream No 2 – Neutralizer (mix thoroughly before use). Approximate exposure time (varies depending on lash porosity, curl test, room temperature):
- Very thin lashes: 5 minutes
- Thin or colored lashes: 5 minutes
- Normal healthy eyelashes: 6 minutes
- Strong, thick lashes: 6 minutes
The second step is applied 1 mm from the roots to 50% to 70% of the length of the eyelashes. Be careful to apply the second step to all the places where the first step was. Do not wrap the product with foil.
- Wipe off the product with a brush or paintbrush, do not use water.
- Color your lashes. Carefully place the liner under your lower lashes and color both your upper and lower lashes.
- Apply PERM & LIFT Cream No 3 – Conditioning Lash Food Lotion. Apply a small amount of serum, leave on lashes. We always use this step – it ends the chemical processes in the lash. It should never be skipped.
- You will release the eyelashes from the curler.
Share


